With root access, you can get over all those restrictions applied by the manufacturers or carriers on the respective Android device. You can easily run any app requiring root access, customize your device to a vast extent, speed up your device processor by overclocking it, etc. Thus you’ll see that the rooting technique is very beneficial and not at all scary. Also, your device won’t get affected or damaged if it is properly rooted. In our each article we not only assure you but also guarantee that your Galaxy mini won’t be at all harmed if done properly. The main aim of most of the users after rooting their device is to install Custom ROMs. This is the best way to enjoy all those latest versions even if your device is an aging Galaxy Mini. But you can install the custom ROMs using a custom recovery tool.
You know that every Android device comes with an android stock recovery. Recovery basically is a built recovery tool and is used to recover your device during its bad times. When you buy any android phone it comes with a stock in-built recovery. As compared to the stock recovery you always get something extra features in it. Some of these include installing custom ROMs, wiping data and cache partition, increasing the internal memory size, performing backups, fixing permissions, restoring, and much more. It allows you not only to flash custom ROMs but also to perform advanced operations like Nandroid backup, installation, and maintenance operations which aren’t possible with stock recovery. It is very easy to enter the CWM using the buttons which varies from device to device. Now let us discuss about the aging device galaxy mini/pop. This device introduced a few years ago was a typical mid-range device. It had some features which were worth notable. It was launched with Android 2.2 Froyo and was later upgraded to Android 2.3 Gingerbread. But after that, the Samsung Company lost attention and got diverted from this phone. But it was the custom android developers who took a step ahead and involved in developing custom ROMs based on the later launched versions, especially for Galaxy Mini.
How to Root Galaxy Mini and Install CWM Recovery
A few days back the Cyanogenmod team launched a CM 11 ROM running on the latest Android 4.4 KitKat for Galaxy Mini/Pop users which was indeed the most shocking and surprising news for everyone. So if you have no patience, just head on to our article to root and install CWM recovery. We thanks a lot to the XDA senior member Squadzone for bringing Odin flashable CWM for Galaxy Mini.
Disclaimer
This procedure will void your device warranty. But if you want to regain it back then you can un-rooting the device. Follow all the step-by-step procedure at your own risk. We will not be held responsible for any damage.
Caution
Note that this guide mentioned below is only and only for Samsung Galaxy Mini/Pop with model number GT-S5570. Hence, check your device model number before going ahead.
Downloads
Rooting Package for Samsung Galaxy Mini/Pop CWM Package for Galaxy Mini/Pop (having Froyo) CWM Package for Galaxy Mini/Pop (having Gingerbread)
Pre-Requisites
Backup your phone’s battery at least up to 70% to avoid any interruption. Besides, backup your important phone data and settings, etc for safety. Enable the USB debugging mode from your device settings. Install Samsung USB Drivers on your PC.
Steps to Root Samsung Galaxy Mini/Pop GT-S5570
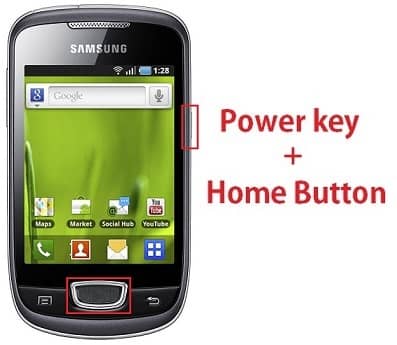
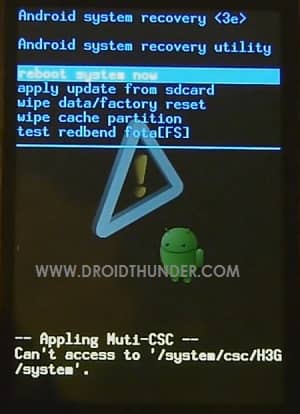
Download the Root package on your device using the USB cable. Now boot your Galaxy Mini into its stock recovery mode. For that firstly switch off your phone completely. Press and hold the Home button (Middle button) + Power button simultaneously until the recovery mode appears.
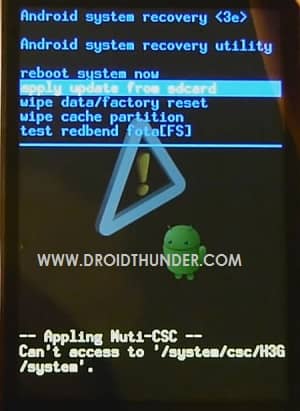
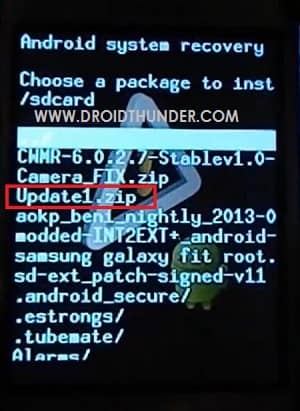
In this recovery mode, touch will not work. Hence, use the Volume keys for navigation and the Home button (Middle button) for selection. Using the volume keys navigate to the ‘Update from SD card’ option and select it using the Home button.
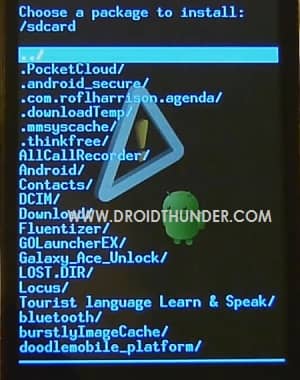
This will show all your files present on the external SD card.
Now again using the volume keys, navigate to the Root Package (Update1.zip) file and select it. This will start the Rooting process.
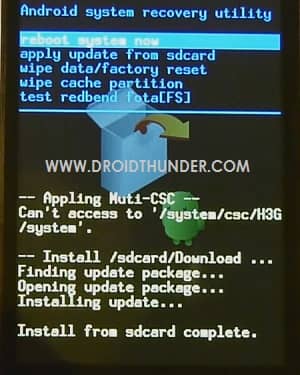
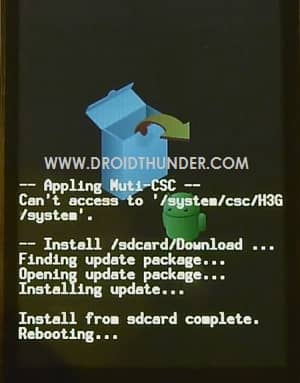
Upon completion, you will automatically return to the recovery mode main screen.
Select the ‘Reboot system now’ option to reboot your Galaxy Mini.
Finally! This is how you can successfully root your Samsung Galaxy Mini and Pop. An app named Superuser will automatically install on your phone. This Superuser app supervises every app that requires root access. Now you can easily play with the system settings of your phone.
For detailed procedure to install Custom Recovery like Clockworkmod CWM follow the method given below.
Steps to Install CWM recovery on Galaxy Mini/Pop
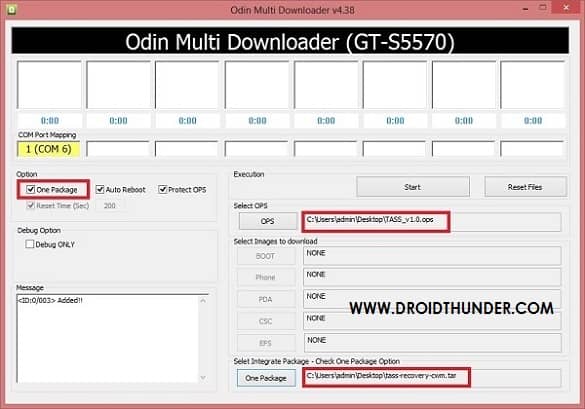
If your Galaxy Mini/Pop is running on Froyo then download the CWM package for Froyo. Whereas, if your device is running on Gingerbread then download the other CWM package for Gingerbread. Copy and extract the CWM package file in a specific folder on your computer. You’ll find the following 3 files in it: Odin multi downloader_v4.38, TASS_v1.o, and CWM tar file. Now switch your device off completely and enter into the downloading mode. For that, press and hold the Home button + Volume Down + Power button altogether. Keeping the mobile in download mode, you need to connect it to the computer via USB cable. On PC, launch the downloaded ‘Odin Multi Downloader_v4.38‘. As you open it, the ID: COM section in it will turn yellow. This will confirm a successful connection between your phone and the PC. If this does not happen, then again install the latest Samsung UBS drivers on your PC. Now select the OPS tab on Odin Downloader, and select the ‘TASS_v1.0.ops’ file from the CWM package. After that tick the ‘One Package’ option. As soon as you tick it, the One Package option at the bottom will highlight. So select that One Package option and browse for the ‘CWM tar file’ file. Remember not to check or un-check any other option on the Odin Multi Downloader.
Press the Start button to start the process. Your phone will automatically reboot itself while going through the process. Do not touch or remove the USB cable until the process completes. Wait for 5-10 minutes to complete the process. Upon successful completion, the ID: COM section will turn blue with the Pass message. Now you can safely remove the USB cable.
Note: If the process fails, then close the Odin window, remove the battery and re-insert it. Again go into download mode and repeat everything.
Conclusion
Finally! This is how you can root and install CWM Custom Recovery on your Samsung Galaxy Mini and Pop GT-S5570. There are no restrictions now. You are absolutely free to flash Custom ROMs, take backups, wipe data, and much more on your device. Notify me of follow-up comments by email. Notify me of new posts by email.
Δ tq
