Due to licensing restrictions, the developers do not include the GApps in the AOSP-based custom ROMs. It is therefore required that you flash them separately via a custom recovery. Remember that you need to install these GApps every time you flash a new custom ROM. Without these Google apps, you won’t be able to use any Google services on your android device. Why do I have to install Google apps instead of installing Google play app and downloading Google apps from it? Well, flashing the GApps package doesn’t mean you’re installing only the APK files. The GApps zip file includes application-supporting frameworks and service packages. This is necessary to properly execute the Google apps after installation.
How to Download and Install Google Apps
In this guide, we’ll go through an easy step-by-step process to download and install the GApps on your Android smartphone. Whether it is Android 8.0 Oreo, Android 7.0 Nougat, Android 6.0 Marshmallow, Android 5.0 Lollipop, or Android 4.4 KitKat, here, you’ll get the latest Google Apps (GApps) for any Android version.
Disclaimer
Proceed at your own risk. We at Droid Thunder are not responsible for any damage.
Requirements
Phone charged at least up to 60% to avoid any interruption. Rooted Android device. Custom Recovery like Clockworkmod (CWM) or TWRP installed on your phone.
Downloads
GApps (All Versions)
Steps to Install Google Apps (GApps)
In this article, we’ll use TWRP and CWM custom recovery to install GApps on custom ROMs. Let’s get straight into it.
Method 1: Using TWRP Recovery
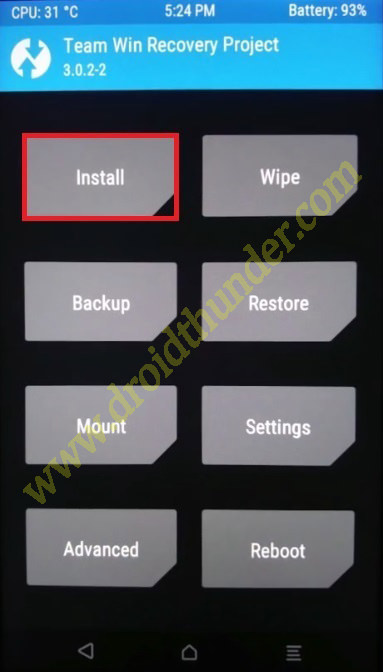
Download the GApps package file from the link given above. Do not extract the zip file. Then copy that GApps.zip file on your Android device. Boot the device into TWRP recovery mode using your recovery combo buttons. If you don’t know which buttons to press, use the ‘Quick Reboot’ app from Google Play Store. Once you are in TWRP recovery, click on the Install option present there.
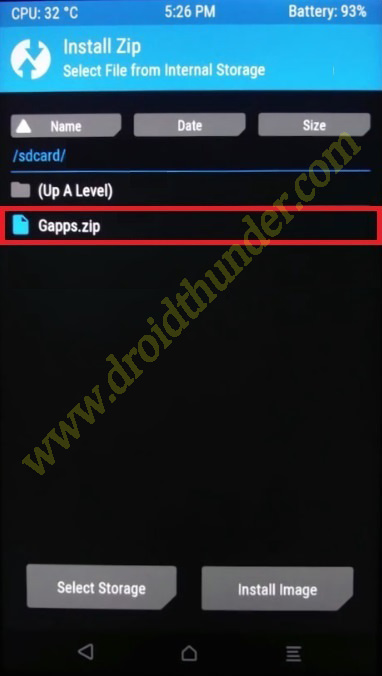
Then navigate to the GApps.zip file which you’ve copied earlier and select it.
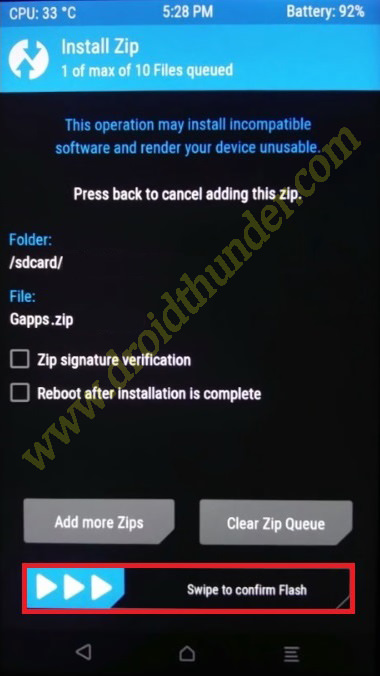
On the next screen, swipe right to initiate the Google Apps flashing process.
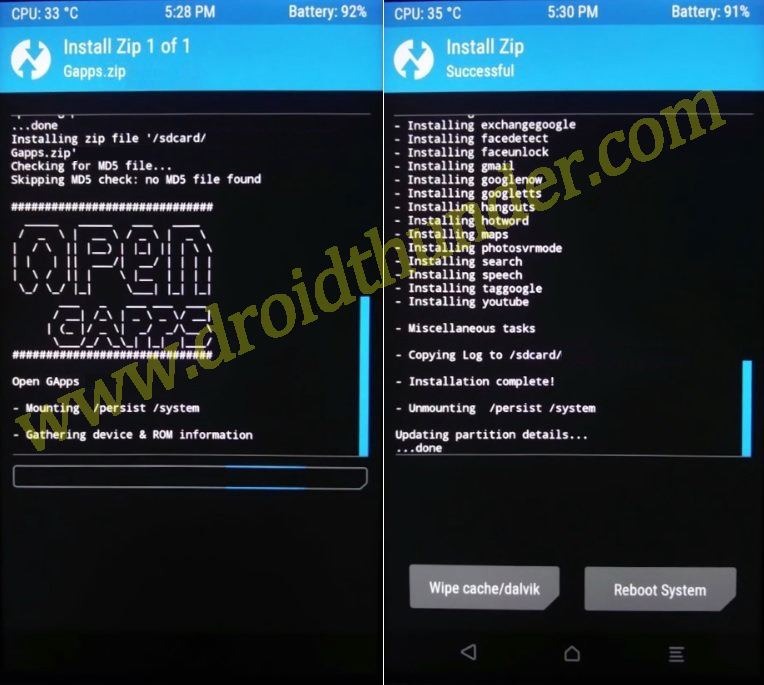
Be patient and wait until the flashing process finishes. As soon as it completes, you’ll see a successful message on the screen.
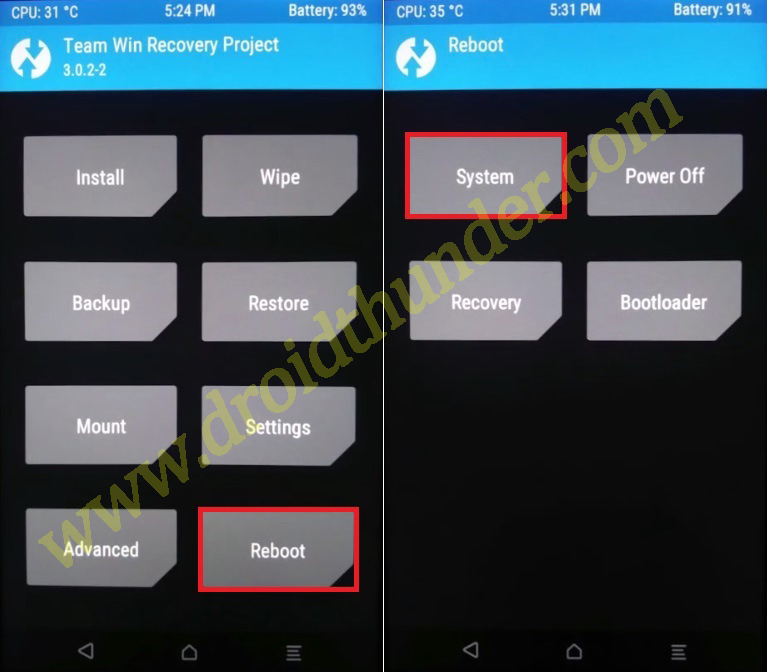
Then restart your Android device by selecting the Reboot→System option present on the TWRP recovery mode itself.
Finally! You’ve successfully flashed the latest Google Apps using TWRP recovery on your Android smartphone.
Method 2: Using CWM Recovery
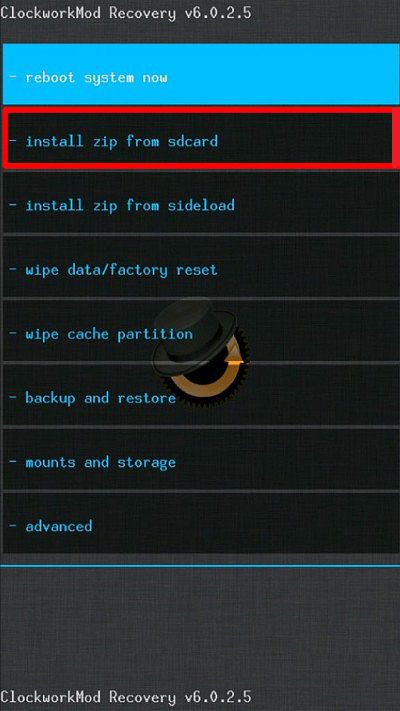
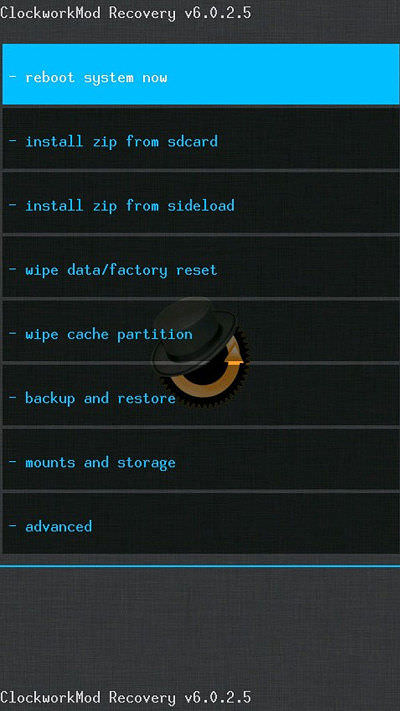
Download the GApps package file from the link given above. Do not extract the zip file. Then copy that GApps.zip file on your Android device. Boot the device into CWM recovery using your recovery combo buttons. If you don’t know which buttons to press, use the ‘Quick Reboot’ app from Google Play Store. Once you are in CWM recovery, click on the install zip from sd card option.
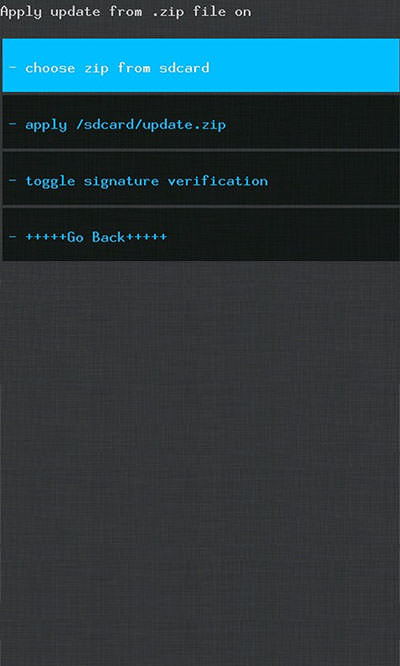
On the next screen, click on choose zip from sd card option.
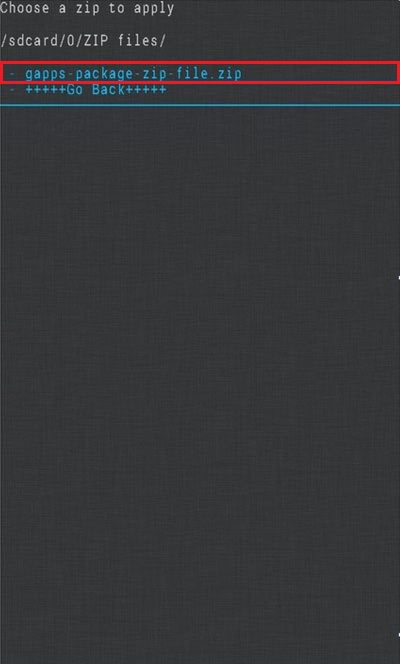
This will show you all the files located on your phone. Just navigate to the GApps.zip file that you copied earlier and select it. On the next screen, press yes to initiate the Google Apps flashing process.
Wait, as the flashing process will hardly take a few minutes to complete. You’ll see a successful message on the screen as soon as it completes. Then click on ++++Go Back++++ and restart your Android device by selecting the reboot system now option present on the CWM recovery main menu.
Finally! You’ve successfully flashed the latest Google Apps using CWM recovery on your Android device.
Conclusion
Finally! The latest Google Apps (GApps) have been successfully flashed using TWRP/CWM recovery on your Android smartphone. Do share your experience after following this guide. Also, if you encounter any issues, feel free to contact me via the comments box below. Source Notify me of follow-up comments by email. Notify me of new posts by email.
Δ

